Overview of OA Frame work.
Oracle Applications Framework (OA Framework) is the Oracle Applications development and deployment platform for HTML-based business applications.OA Framework consists of a set of middle-tier runtime services and a design-time extension to Oracle9i JDeveloper called Oracle Applications Extension. Oracle9i JDeveloper with OA Extension (OA Extension) is a world class J2EE-based integrated development environment
OA Framework is designed around the simple Model-View-Controller (MVC) architecture The MVC architecture is a component-based design pattern.OA Framework technologies has driven several industry standards and has adopted several others.OA Framework is J2EE based and features several industry standards such as XML, HTML, Java, JSP, SQL and Web Services.OA Extension provides features such as easy-to-use wizards, a hierarchy navigator, and a property sheet. These features enable developers to populate the metadata for declarative application business logic and user interfaces.
Patch 4045639 - 9IJDEVELOPER WITH OA EXTENSION ARU FOR FWK.H
Patch 4141787 - 9IJDEVELOPER WITH OA EXTENSION ARU FOR CU1
Patch 4573517 - Oracle9i JDeveloper with OA Extension for 11.5.10 CU2
Patch 4725670 - 9IJDEVELOPER WITH OA EXTENSION ARU FOR 11i10 RUP3
11.5.10K = patch 4045639


OA Framework Architecuture is based on the industry-standard J2EE MVC design pattern.So Developers manipulate the application's metadata using Oracle 9i JDeveloper OA Extension .
Create an information template:

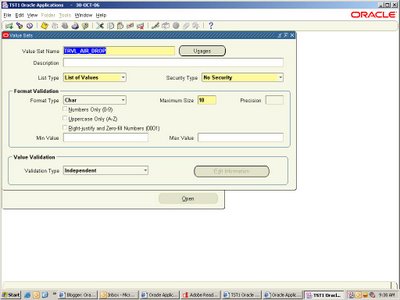
create value set name as TRVL_AIR_DROP
List type List of values
validation type inpedendent
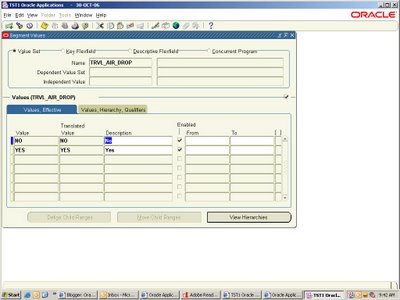
2. Create values for TRVL_AIR_DROP
Navigate from po setup->flex fileds->validation->values
3.finally Attach the Poplist to information template attributes.
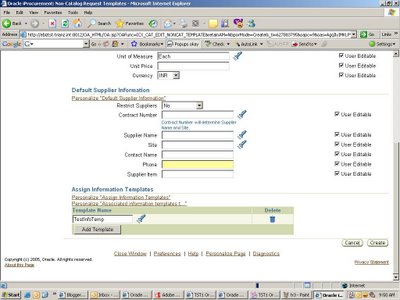
4.Next Go to iProcurement Catalog Adminstration .Navigate Non catalog Request Templates
Click on create button and pass the necessary inputs and click on add template button pass the information template which we customized in PO.

Template name : Test Travel Req
Organization : select your orgnization.
5. Click on stores link under Manage Content link
click on edit under Non-Catalog Request Store then Click on Add template Button
select template name which we made in previous screen (ie Test Travel Req) And Submit.
6.Finally you can see the result at iProcurement Page
select the Request Type : Test Travel Req
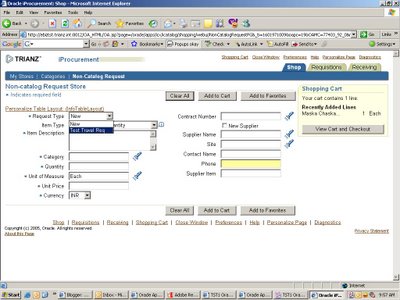
You can see the our customization result under Testinfo Temp Layout.

you can see above information in following table
select * from POR_TEMPLATE_INFO
REALMS
Oracle iProcurement, securing attributes called realms are used to restrict requester access to the catalog.
or
Realms are securing attributes used to control access to the catalog as an additional layer for application security
ICX_POR_REALM_ID -->Use this attribute to secure the responsibility for category or item
source realms.
Once you create a realm, you assign it to a responsibility or user. The requester associated with that responsibility or user can see whatever categories or item source catalogs are contained in that realm.
STEPS:
1. Create the realm. 2. Assign the realm to a responsibility. 3. Optionally assign realms to individual users if desired.
Create the Realm:
1.Log in to Oracle Purchasing And Navigate Setup > E-Catalog Admin > Realms.
2.in window enter your own Name and Description for the realm.
component Type : Category
components: select any existing Category.
3. Save your work Realm Id Generated automatically.
Assign the Realm to a Responsibility:
1.Log on to Sysadmin
2.Open the Responsiblities window
3.Query the responsibility to which you will assign the realm.(Ex: iProcurement)
4.n the Name field, use the LOV to select ICX_POR_REALM_ID.
5. Click on Values Button In the Values Button Select the Relam ID
6. And Save your Changes.
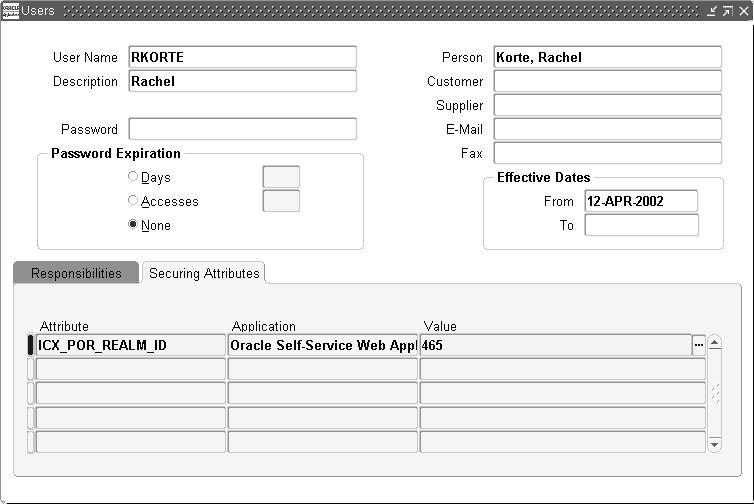
Assign the Realm to Users (Optional):
1.Log on to Sysadmin.
2.Navigation path: Security > User >Define.
3.Query the user (person) to whom you want to assign the realm.
4.In the Securing Attributes tabbed region,in the Attribute field, use the LOV to select
5.In the Securing Attributes tabbed region, create a line for each realm you want to assign to the user. Select ICX_POR_REALM_ID in the Name field and the Realm ID for each realm. 6. Save your work.

RESULT.
Categories restricted by realms display to requesters when browsing categories;however, the items in those categories do not display.

No comments:
Post a Comment